On Sewing and Sewing On

Last week I completed the BurdaStyle Teacher Certification course. It is an online course where you watch videos on their core techniques to use when teaching others using the Burda patterns. There were 4 assignments to complete using these core techniques and I was required to take pictures of each project to upload for grading. Each project had various photos to show the skills and techniques used. The course began in September and closed in January. That’s plenty of time to complete — right in the middle of the holidays and my temporary/part time job and the classes and private lessons that I already teach. Absolutely! I’ve got this.

I was determined to complete this. It was a bit of a crunch for me. But, I really wanted that piece of paper and the recognition that I am certified to instruct others in the BurdaStyle way. Many of these techniques I have used before and many I have learned some ways to be a bit sloppy with to get by. So, it was good to take the course and work through all the projects. I did learn quite a few valuable skills.

The projects were specific. A pair of bermuda shorts, inserting in seam pockets, a zipper placket and waist band.  A sweatshirt using knit fabric and inserting front pocket and a style feature of gusset-like panels on the side and adding the neck band. The dress had a side seam invisible zipper, bust darts and skirt darts and a peter pan-style collar. And finally the short jacket had set-in sleeves and a lining. Hand stitch was used in each project for hemming. The sizes for the projects were not within my size range with the exception of the sweatshirt. I made the largest size in each project. There were plus size patterns included in the course to use for practice and I plan to sew some of them up soon.

Here are the shorts. I am please with how they turned out.

IMG_4343

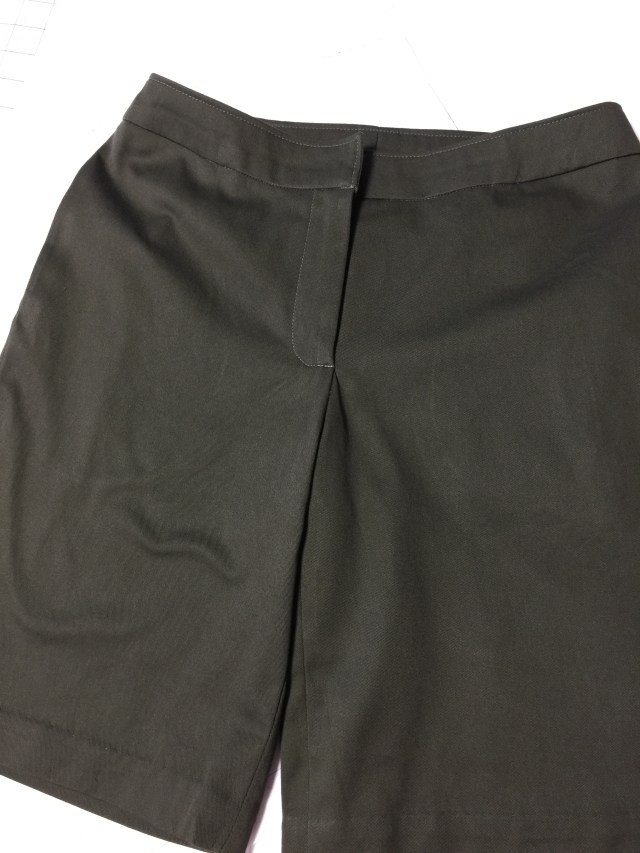
BurdaStyle Teacher’s Certification short

Here is the sweatshirt. This one was made from a sweatshirt material.

IMG_4354

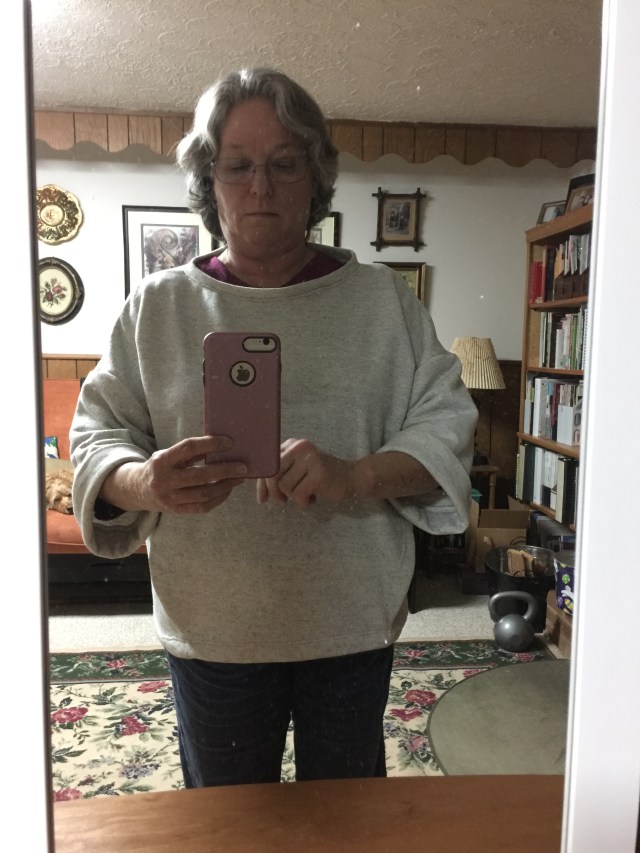
BurdaStyle Teacher’s Certification Sweatshirt.

I enjoyed it so much I made a second using a sweater knit and french terry. Both garments are very warm and cozy. Perfect for our weather here this year as it’s been a bit cold during December and part of January. You can see some of the angles of the side gussets in the contrast version.

IMG_4469

Loved this so much I had to make another.

I really like the style of the dress. I wish I could wear it. It would be fun to wear. Now I guess I need to practice my resizing skills….

IMG_4665

BurdaStyle Dress Assignment

The jacket was made using a wool blend and a poly lining that I found in my stash. Yay for stash busting. I love the way the lining looks.

IMG_4661

BurdaStyle Jacket Assignment and final project.

IMG_4678

BurdaStyle Jacket Assignment. Check out the lining.


I am still running my kids neighborhood group through The American Sewing Guild. We call it Kids Sew Too. We had our monthly meeting yesterday and these are two of the gals in attendance showing off their Emoji Pillows that we worked on. This project involved hand and machine sewing. They each had a choice of which “expression” to create. Most picked the “heart eyes”.  Maybe because they love sewing as much as I do!

IMG_4693

The ASG Kids Sew Too Emoji Pillows


IMG_4694

I’m so “in love” with these kids

I am looking forward to getting back to sewing up some more of the Burda patterns once things with my part time job settle down a bit. My sewing classes and private lessons of teaching others is continuing to grow and I am loving every minute of that.

I’m also loving reading all the other sewing blogs on the ‘net and following how all of you are getting along. There is so (sew) much sewing fun all around.

Cheers and Happy Sewing/Creating New Year!

Posted in BurdaStyle, Sewing, Sewing Lessons | Tagged , , , | 3 Comments

Super Hero’s Capes

Hi there! Remember me? Well, if not, let me introduce myself. I am the busy, over ambitious mother to 8 and grandmother to 5 woman fast approaching old age who is feeling the need to cram just as much as she can into life as she knows it. Oh! And we are finally empty nesters….holding my breath still on that one….No, really! It’s all good. But, there have definitely been some changes in our household and our life styles in the past few months and that is my excuse and I am sticking to it.

So….how about all this super hero stuff anyway? A few months ago (okay, maybe a year ago) I was asked to copy a super hero cape for one of the sewing families that I was giving lessons to a couple of years ago. Mom had borrowed a cape made by another mom and was needing to return said cape but, her son loved it so much she wanted one made that would be his own.

The mascot for the University of Virginia is the Cavalier or sometimes referred to as the Cav Man. I love this cape style because it doesn’t involve anything being tied around a “little one’s” neck. It is a harness style with a velcro belt — if you will.

IMG_3074

The mom took pictures of the cape with a tape measurement laid out next to it and I just re-created it.

IMG_3080

While I was working on it, I started thinking of all the other super hero capes that I could make.

IMG_3088

And then this one….

IMG_3309

And there are still more….Wonder Woman. And even all the Disney characters with capes. Whew!!!! I need to get busy again.

Anyway, here is a pic shared with me of the little boy with his prized Cav Man cape and his super hero.

IMG_3563

Posted in Uncategorized | 1 Comment

Lesson Learned the Hard Way…over and over

I was asked by a friend of the artist that I make the pillows for to make some pillows for her. We arranged to meet at the beginning of November to discuss what she wanted me to make. By the time I had gotten to our meeting the accent pillows had become a request to make a window seat cushion. And maybe some drapes?

As we were measuring the window seat, I was explaining that altho I have made drapes and roman shades before my sewing space really isn’t large enough to adequately handle such projects. The window seat measured 130 inches by 20 inches. I explained too that with the holidays coming up that I really wasn’t going to be able to begin making the project until after the new year. She was fine with that. So, I worked up a quote. She accepted it and I began lining things up to be ready to tackle this and get it done at the beginning of the year.

I found a place that has some reasonable cost for the foam and they could glue it together so it was the proper length. The customer ordered her fabric and had it shipped to me. I purchased the cording for the piping and the batting and the white muslin for the lining….Yes, she requested it be lined.

I made yards and yards of bias binding and made just as many yards of piping. I think it was 20 yards.

img_3618

And I stitched the piping to the top and bottom. I tried to baste the lining to the top but, the piece was too long and I was afraid of it creating a wrinkled mess. So I made a separate cover of the muslin for the lining. I managed not to take a picture of that but, the lining fit like a glove.

I sewed the side panel all the way around starting a one long side across the short end and up the other long side leaving the other short end opened and un sewn to be able to slide the finished cover onto the cushion. I attached the bottom and as I was nearing the end of the last long side I was 4 inches shy of matching up with the top. Ugh!!!! Agitated, I put the cover in time out and slept on my next plan of attack. Where had I gone wrong?

When I went back to it I ripped out a seam and tried again.  Still. It would not line up. More thinking and more ripping. Re-sew. Still won’t line up. Really?

img_3662

Here I had it laid out on the back of the futon and a chair in the middle and a folding table to support it. While I scratched my head and it went right into the doorway of this room.

More time out. More ripping out. Completely ripping it all apart. And stitching it all back up. This went on for weeks. I did some sort of ripping out 8 times! Ugh!!!!

This thing was waking me up at night. I was denying myself enjoying anything else as I felt that I needed to be finishing this project. Even to the point that I was just spot cleaning the house as I really needed to spend my time working this thing out. I canceled a weekend trip to Baltimore to attend the American Craft Show. Sigh.

I finally decided that this cushion was going to have piping along the top and not the bottom. Made sense to me as that is where everything seemed to go wrong. Well, wouldn’t you know, that did the trick! It finally worked!!!

And it slid on really easily with the lining cover on it already. Boy, I was one very happy gal and was finally able to get a good night’s sleep. Yay!! I hand sewed up the opened short end and it was done.

Then, after looking at this in my small rooms, taking up so much space, I began to worry that it was going to be too long for the window seat. What if it didn’t fit? What if?????

Well, my husband helped me deliver it today and……

img_3673

It’s perfect!!! Phew! (Looks smaller in her house, doesn’t it!)

Lesson learned? Next time someone asks me to do something that requires yards and yards of piping, or yards and yards of fabric? Will I say, “I’m sorry, I’m just not set up to do that big of a project.” Ummm…..I sure hope I can remember to take a breathe and think before I answer. But, I probably will say, “Sure!” It’s so hard for me to say no.

Now it’s time for some selfish sewing…..I have a pair of Ginger Jeans and Ebony Top and an Explorer Tote and….and….and…waiting for me to sew.

Posted in Uncategorized | 4 Comments

Sewing Decorative Pillows

I have made a lot of decorative pillows. They are fun. Most everyone loves to add that personal touch to their own decor with a pillow. I have taught classes on how to make these pillows. I will recap my process for you here.

img_3066

To make a pillow like one of these you will need a pillow form. Pick a pillow form that is any size that you want to add to the decor of any room in your house. Big, small, rectangle, square. Which ever your heart desires.

This helps to decide how much fabric you will need and what size zipper you will need. Generally, I suggest an 18″ X 18″. For this pillow you will need at least an 18″ all purpose nylon zipper that matches the fabric that you will use for your pillow front and back. The fabric for your pillow can be pretty much any type of woven fabric. Solid, print, denim, quilter’s cotton, you can pick. 3/4 yard is the amount that you’ll need. Then you will need 1/2 yard of a coordinating fabric to use for the piping. If you are trying this for the first time, try to pick a fabric that is not too heavy. Even a light weight denim will work. These pillows that I make for my client are backed and piped with a linen blend. You’ll also need 2 1/2 yards of 1/4″, 6/32″ or 1/2″ cotton cording.

Now let’s get to work…..

For this project I create a continuous bias tape. It took me some time to learn this technique (as I had to keep the directions handy for reference) but, now I just go with it. I find it so much easier than cutting bias strips and sewing them together. And one fat quarter of fabric can yield up to 8 yards of bias tape (depending on how wide the strips are cut). I generally get around 7 yards for the pillows when I am using linen and 6/32″ cording. I learned this method from this tutorial….Continuos Bias Tape from Melly Sews website. (Note: check out her wonderful Blake Slate Patterns while you are at her web site. They are super awesome and really fun! There is something for the whole family.)

img_3059

Once I have made my mound of bias tape, I put the zipper foot onto my machine and wrap the bias tape around the cording, keeping the cord centered in the middle of the tape and the raw edges lined up, stitch close to the cord on the outside. This typically will leave about a 1/2 an inch seam allowance on my piping/welt.

img_3135

img_3060

Now that I have my pile of piping/welt, it’s time to prepare the pillow fronts and backs.

I cut front and back pieces the same size as my pillow form. This creates a nice, plump pillow.

The next step is to attach the piping/welt to the front of the pillow fabric. To do this I line up the raw edge of the piping to the raw edge of the pillow fabric at the side of the pillow. By starting somewhere in the center of the side it will allow me to create a nice finished look for the finished project. I begin stitching with the needle moved slightly towards the cording.

img_3061

Once the piping is attached it is time to begin prepping for the zipper. Easy now…it’s not that bad. I stitch the back of the pillow to the front (right sides facing) just about two inches on each side of the bottom. In other words, I stitch the back to the front from the right hand corner two inches towards the center and again at the left hand corner leaving the center opened for the zipper. (see photo below)

img_3062

With my zipper opened and facing down I lay the right hand side of the zipper so the teeth are against the piping and the top tabs are within the seam allowance that I just created on the right hand bottom edge (the pillow back is pulled gently back towards the center of the pillow, keeping it out of the way for now). Carefully stitch close to the teeth all the way to the bottom tabs…which should fall into the seam allowance at the other corner.

img_3063

Then I close the zipper and flip the pillow over so I am able to line up the opposite zipper tape with the edge of the pillow back. I sew close to the zipper teeth about 2/3rd or 3/4 of the way down. Then I stop with the needle in the down position and slide the zipper past and behind the needle. Now I can easily finish sewing the rest of the zipper tape attaching it to the back. I then test my zipper to make sure it opens and closes freely.

Whew! I am almost done!!! I make sure that I leave the zipper opened about 4 – 5 inches. I have only forgotten this important step only once. I will be turning the pillow right side out through this opening. Now, with the back facing up, I line up all the remaining 3 sides of the pillow. Then I can begin sewing just at the bottom edge on the left side of the pillow. I am sewing close to the piping above the bottom of the zipper tape. I stitch around the corner and continue all the way around the pillow staying close to the piping, until I turn around the bottom right corner of the pillow…again, I am stitching just above the zipper tape at the top of the zipper. This gives the bottom corner a nice, neat finish.

img_3064

That’s it! I am done! I trim any excess seam allowance to about 1/2 inch and turn my pillow right side out. I stuff my pillow form in and zip it closed. I usually give my pillows a good shake from each side to evenly distribute the pillow form.

The instructions sound rather complicated but, I assure you it is really quite easy to make these pillows. I enjoy it so much that I have made around 100 of them. And these techniques used are one of my best sought after classes. I love making the continuous bias strips for my piping and I love how simple it is to put this zipper in. Please share your pictures with me of your pillows. I would love to see them. And as always message me with any questions.

Posted in Uncategorized | 3 Comments

Summer Has Flown By

IMG_2065

How does that even happen? Summer is almost gone. Although the temperature here are still very much like summer. Schools in our area starts next week. Both the local public schools and the university. I have now graduated to college level schedules as the last of my children is on that schedule.

All of my schedules are changing. My private and small group sewing students are preparing for their new school year to begin and I am in a bit of a lull waiting to begin my Fall sewing classes. It’s nice to have some time for planning and to have time to finish up projects and begin some new.

IMG_2053

I do already have some classes that are already scheduled and registration has begun through the Charlottesville City Parks & Recreation Program. (Click the for the link.) I will be offering 7 classes this Fall. Classes begin September 6 and some fill up very quickly so don’t delay.

Here is a brief rundown of the classes I will be offering:

Monday:  Beginner Kids Sewing – ages 8 -12 AND Beginner 2 Kids Sewing – ages 8 -12

Tuesday: Beginner Adult Sewing AND Mend It Sewing

Wednesday: Beginner Teen Sewing – ages 13 -17 AND Basic Quilting AND Adult Advanced Sewing

Thursday: 60+ Classes – Senior Sewing

Our monthly American Sewing Guild Neighborhood Group for Kids Sew Too will resume the week. We meet the third Saturday of the month from August thru December. Membership is open to the public. Come join this great bunch of kids as I guide them through a different project every month that builds skill and confidence.

I am very excited about these offerings and if you have any questions please leave me a comment. And tell all your friends.

Happy end of Summer!


Posted in Uncategorized | 5 Comments

Sunday Sevens

It has been a week. And a week it has been. Here is my collection of seven (or so) photos from my week. Natalie at Threads and Bobbins created this link up to share what we have been doing with the rest of our time during the week. Anyone can join in at any time. For more details go here.

IMG_2068

  1. IMG_2870

This was taken last Saturday when I dropped my youngest fledging off at the catering job she was doing and I had to stop to take a photo of the spectacular view. This is on Brown Mountain looking towards Charlottesville. The white building that you see on the next hill is Monticello, home of Thomas Jefferson. Tomorrow, July 4, is the United States celebration of this country’s independence. Every year there is a Naturalization ceremony at Monticello. If you which to learn more check it out here.

2. IMG_2872

I am experimenting with stamping with fabric paint. I will tell more of this later.

3. IMG_2873

I received this very pretty orchid in the mail. Can you imagine? But, it is healthy and happy. Oh, I was given it because…..

4.

It was my birthday week! I have reached the magical age of “6” with a zero behind it! I got the cupcake for picking up my cake that my wonderful husband ordered. The bakery gives anyone who stops in on their birthday a free cupcake of their choice. Yes, that is bacon on the cupcake. It was dark chocolate with mocha frosting and bacon. Yum! The big cake was carrot. It was fabulous!

5. IMG_2879

There was a brief thunderstorm in the evening but it cleared out and we were able to go eat dinner in the downtown area. It was lovely to sit outdoors.

6. IMG_2892

The week was spent brining these sour pickles. They are now ready for us to enjoy and my husband is thinking up all kinds of meals to pair with them.

7. IMG_2893

I was asked by the swim team committee at the pool to make this shirt for the coach’s one year old son. I usually monogram the swim team bags and I used to have a cute dolphin embroidery. Unfortunately, with computer system upgrades and such I am unable to retrieve that stitch out so I just created an appliqué to add to the shirt when I was making it. It is done in the team colors. I used the Field Trip Raglan t-shirt pattern from Oliver & S. It was a quick and easy project (except for the mishap with one of the threads on my serger that broke not once but, twice on the final seam. Gotta love it, right?

Hope everyone has a wonderful week ahead. Stay safe and happy and productive. I know that’s my goal.


Posted in Uncategorized | 5 Comments

My Spin on this…still spinning

I love my sewing magazines. So much inspiration, so many possibilities. I usually just dog ear the page to return to later and very rarely do. But, this pattern in the June/July 2016 Sew News issue really had me thinking (instead of sleeping)

thumb_IMG_2841_1024

Based on your measurements, you can create just one pattern piece to make this really cute, casual dress. The dress is constructed by 4 of that one piece. Neat. Right?

I don’t enjoy wearing long dresses but, I thought this would look really nice in a tunic length. And I had a piece of this colorful jersey knit that I wanted to use for my new tunic.

IMG_2843

I took my measurements and tried to follow the directions for drafting out my pattern piece. IMG_2842

You can probably see that I attempted to draw this pattern a couple of times. And then a couple of more times. Apparently I am not good at measuring myself. Or at least the measurements don’t seem very accurate. Does anyone else have the same problem? Well, I pushed forward.

IMG_2845

This knit was my choice for the lining.

IMG_2846

I was really kind of liking the results. That is, until I tried it on. The lower parts of the “V” were much too deep under the arms and in the front. Ugh! I had to set it aside for a day or two and ‘sleep on it’ for a bit.

The shoulders were to be fastened with buttons. And the over lap was going to be way too much in order to make it fit me correctly. It was terrible. So much so, I couldn’t bare to photograph it. After a bit of time thinking, I decided that I needed to remove the points at the shoulders and create a shoulder seam to take up the way too much depth in the dips. I really didn’t know what else to do. I opened up the side seams at the shoulder and seamed it together.

IMG_2864

It’s still not exactly what I had wanted out of the pattern or with the fabric but, it is wearable. At least I am wearing it. Even as I write this post. I just haven’t taken a picture of me wearing it yet. So, I wouldn’t call it a total flop and I am only mildly annoyed with the way it turned out. I am still trying to work the pattern around in my mind on how to make it work out better. I do want to try it again. I guess I would feel better about the whole process if I could understand what went wrong with my measurements. Maybe my body type just isn’t suited for the pattern style? Maybe I can figure it out on the next go around. I will let you know my spin on the next one I try.

Here’s hoping all your sewing projects are winners!


Posted in Uncategorized | 6 Comments

Sunday Sevens – Happy First Day of Spring

Yay for Spring and Sunday Sevens. A fun collection of photos to share from our week. Learn the details to join in from Nat over at Threads & Bobbins.

IMG_2068
I am making a side-saddle apron for a woman who is involved in a neighboring county historical society. I like to challenge myself. And this has proven to be quite the challenge. In the meantime I have a saddle in my living room. At least, it matches my color scheme.


The weather this week was beautiful. I tried to spend as much time out as I could manage. The dog and I enjoyed some of the flowers on our walks.

Bright blue skies –


Flowers by the creek –  

Other people’s beautiful camellias –  

We planted this tulip magnolia a couple of years ago. It is pretty this year. I can’t wait until it’s full grown. I love these trees –   

Our poor, pitiful camellia. We have had this for years and it only manages a bloom or two per year. It looks good all Fall and WInter and then just before Spring it starts to get bare. At first, I thought it was a fungus or something that was causing it. Now we have decided that it is in fact deer. They typically don’t eat these but, because this one is smaller and maybe more tender when the supply of food is low they head for my poor plant. This Spring we have 2 blooms! –


I like to joke that we bought this house because of the abundance of daffodils. I look forward to this display of color in our backyard every year.

 
And along with the first day of Spring it is Hubby and my’s anniversary. The feature photo is one of my gifts. Mmmmm, chocolate! When we got married 17 years ago. We also closed on this house the same week and moved in the following weekend. Crazy to think of now. Planning a wedding and moving all at once — with seven of our eight blended kids no less. Crazy, I tell you! (Chocolate, anyone?)

Happy Spring everyone!!! Hope everyone has a great week ahead.
  

Posted in Sunday Sevens | Tagged , , , | 7 Comments

A Tisket, A Tasket. A Little Easter Basket

  
I really enjoy making little fabric boxes from scraps of fabric and pieces of felt. I have also become a huge fan of enclosed seams. They are quick and easy. I often whip these out for a quick project in my sewing classes. Sometimes you just need something fun to complete now!

So, while laying awake I realized I can easily add a handle to these simple fabric boxes and create a basket. 

To make this box/basket all you need is some fabric and a rectangle of poly felt. You certainly could use wool felt but, I like the available colors and the price of the poly felt. It made me feel a little better to see it was made from post consumer plastic bottles.

  
I cut my fabric to the same 9X12 inch piece of felt. I then cut 2 1/2 X 9 inches off one end of both for the handle. With the right side facing the felt I stitched a 1/4 inch seam on each 9 inch side of the handle.


It seems to work best to trim the felt to 1/8 inch in the seam allowance before turning. 

Give the turned handle a good press after turning right sides out. Stitch close to the seamed edges and again across the handle using the pressed foot as your guide for each line of stitching.

  
Now for the box/basket construction. Lay your piece of felt down then the handle centered along the 9 inch edge with the right side facing up and pin in place. 

  Then lay your fabric facing down (right sides together) on top. The handle will be sandwiched inside.

 
Time to trim out the corners. Draw a 2 inch square out from each corner of your box sandwich and cut both fabric and felt square together.

 
Stitch 1/4 inch along the longer edges on all four sides. Leave the cut corners unstitched until later.

  
Trim the felt part of the seam allowance to 1/8 inch like you did with the handle.

 
Turn the box right side out through one of the corner cut outs.


  Top stitch around the top edge. It can feel a little fiddley with the handle but, just move it out of the way.

With the felt sides touching create a boxed corner. Pin in place. Repeat for all four corners.  Stitch close to the edge. Trim felt and fabric to create a very narrow seam allowance.


Turn your box inside out and stitch just to the inside edge of the corner seams. See photo below.


Turn right side out and trim threads. You are done. Fill your basket with eggs, candies or treats.

 
This is a quick, easy and cute project for Easter. 

  
What type of Easter or Spring sewing are you doing?

Posted in Recipes | Tagged , , | 6 Comments

Sunday Sevens – At It Again

I surprised myself as I didn’t think that I had enough photos to add to the Sunday Sevens this week. Of course, you don’t need seven photos nor do you need to post every week. It’s simply a casual way for bloggers to connect and share their weeks and this whole thing was created by Nat over at Threads & Bobbins. So have a look and join in the fun if you choose. No pressure.

IMG_2068
1 – This post is Spring heavy…’cause like many of you (even across the pond) Spring has Sprung and I am fully enjoying it.

  
2 – Mr. Fox came to pay us a visit. He has been making a regular appearance just to remind me that I cannot have backyard chickens. Oh, no I can’t! There were also reports of a possibly rabid fox in the north end of town biting people and stealing scarves. Our fox does not sport a scarf so, he does not have rabies.

  
3 – More signs of Spring.

  
4 – I made these wall decorations for my sewing room. I am feeling better about my space and more organized.

  
5 – I am still trying to find tiles to add to the ones I already purchased for my kitchen. I really want to finish my various projects around the house. I found these black tiles and decided they would work with the countertops. And 20 tiles cost me less than $5.00. I just couldn’t pass it up.

  
6 – Another sign of Spring. The scooter is washed up and it needed a new battery. I finally got to take it out for a spin. Yay!   AND I put the snow shovels away!!!!

  
7 – My hubby takes the dog for walks up on a trail and once in a while I will go along. The trail is on part of the university grounds. There is an observatory there. Walking and biking trails. Some people run the trails. Lots of people walk there dogs there. Some group (environmentalists? Arborist?) tagged many of the trees. To identify them, I guess.

  
That’s about all for my week. Busy week coming ahead. I hope everyone has a great week!!

Posted in Uncategorized | 14 Comments